Tensorflow Timeline介绍及简单使用

Blog的Github地址:https://github.com/liuyan731/blog


最近上线了一个图片分类的机器学习Python服务,但是在线上的性能并不是特别好,就开始进行痛苦的性能分析。今天分享一个简单但是非常实用的Tensorflow性能调优工具Timeline。

简介

Tensorflow的Timeline模块是用于描述张量图一个工具,可以记录在会话中每个操作执行时间和资源分配及消耗的情况。

使用方法

执行代码sess.run()加入参数options和run_metadata

sess.run() 加入 option和run_metadata参数,然后创建timeline对象,并写入到timeline.json文件中

1
2
3
4
5
6
7
8
9
10
11
12
13
import tensorflow as tf
from tensorflow.python.client import timeline
run_options = tf.RunOptions(trace_level=tf.RunOptions.FULL_TRACE)
run_metadata = tf.RunMetadata()
predictions = use_sess.run(use_out, {'DecodeJpeg/contents:0': image_file.file.getvalue()}, options=run_options, run_metadata=run_metadata)
# Create the Timeline object, and write it to a json
tl = timeline.Timeline(run_metadata.step_stats)
ctf = tl.generate_chrome_trace_format()
with open('timeline.json', 'w') as f:
f.write(ctf)

查看timeline对象

打开Google Chrome,转到该页面 chrome://tracing并加载该timeline.json文件。在该页面上可以每个操作的耗时,以及op的详细信息。

timeline-tool
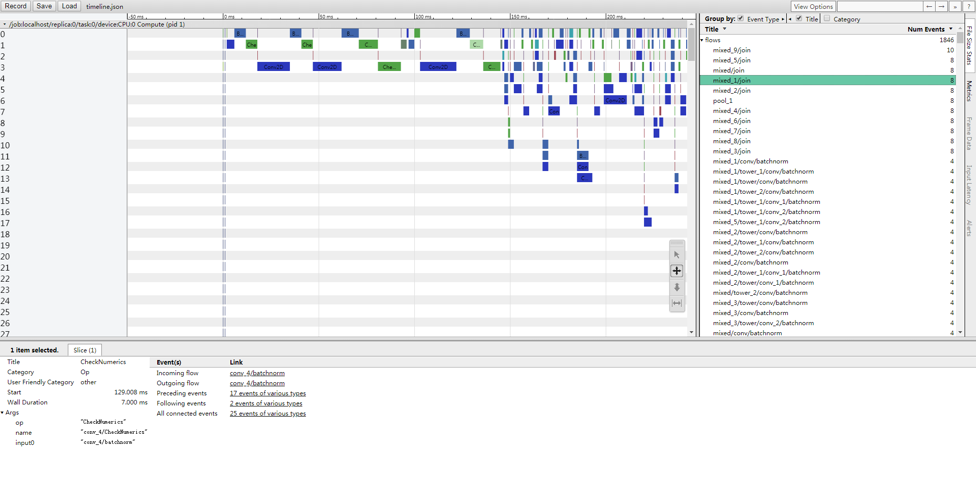
chrome 加载timeline.json文件后展示的运行图


2018/4/22 done

此文章也同步至个人Github博客

Fork me on GitHub